Showing posts with label Revamp. Show all posts

Tuesday, June 11, 2013

Thrifted Chair Makeover.


hmm..Lets start with, these handsome fellas.

As some of you know I am currently a photography student, hence why I have been M.I.A this past week, while out practicing some new techniques on nature, for an upcoming project, these crazies kept jumping in my shots! They're perfect but will my instructors count if there is nature in the background? ha ha
Anyways, My sweet Bennett boy there, turned 8 months old on the 8th! Gahhh! He is growing so fast,I wish there was a pause button on life. I can't believe I am the mother to an 8 month old! This week he has advanced so much, he now pulls himself up in his crib (not for very long but he's working on it),Eats bits of cheerios,puffs, and rolls into sitting position on his own. Still no full on crawl but he is getting around, thats for sure. He does this cute army crawl thing and rolls from room to room following Miss Penny girl. Follow me on INSTAGRAM to see pics of B & his doggy. 
Mommy is so proud of you Bennett! 
Now that I have caught you up on my loves, lets get down to business.


I have a stock pile of projects in my garage, things I just pick up along the way, & a lot of the time I don't get around to doing until months later. Doesn't everyone? (I thought this was normal.)
This was one of those projects. 
I picked this chair up a while back with a fellow thrifty friend Miss Jordyn. <<< Link to visit her blog. I was very unsure of this chair at first. While I loved the shape an such, it was the beginning of our shopping that day & I wasn't sure I was ready to commit. Luckily, Jordyn knows her furniture & she could spot a treasure like this from a mile away! She gave me the extra push I needed to just do it!

Lets check it out, shall we?!


After taking to 2 power sanders to the thing to get through the 4 coats of paint :/ yes... 4!!!! 
A fresh coat of paint, a little stain & this adorable little chair has been given new life.
My paint job is in no way perfect but even with her little flaws she remains flawless. I'm head over heels in love with her!
That beautiful minty blue tone I chose is Tranquility by Valspar. Valspar has these awesome sample sizes that can be found at Lowes for about $4. I often purchase these! The sample covered this entire chair two coats & I still have a little left over. They're great if you don't plan on using the same color very often or like to switch it up on a regular, like I do. Finished this baby with 2 clear coats in Matte finish. & there she is.
I haven't decided 100% where her new home will be. I am thinking spare room, desk chair? That way every time I sit down to write for you guys I can write in style!

Amanda

Thursday, May 30, 2013

Summer Blog Revamp

Did you notice something different when entering the PBAJ zone today?
New season equals a whole new revived look for PBAJ Blog.
Oh boy, and was it beyond long over due!  

I wish I would've done a before & after pic of the Blog, as I do for every other project. 
If you don't remember what it looked like before.. it was black & white, plain text, no logo, blah blah blah, just a bore.

With a few minor tweaks & changes, I think the blog has a fresh new & much improved look. 

I am living for those antlers right now & love, love,
Loving the color scheme!! A few of my fave colors for summer! 
Simple, yet beautiful. 

On another note, whats new? I have been in the garage hard at work all week. So many new treats I want to share! Just waiting for some paint to dry & then this blog is going into over load tomorrow! You're not going to want to miss it! 
Also, a possible upcoming collaboration with a fellow blogger has got me excited beyond belief! So many new projects in the works for PBAJ!

Short but sweet post tonight. 

Leaving you wanting more more!

Until tomorrow my little blogger buddies ;) 

Amanda


Tuesday, May 21, 2013

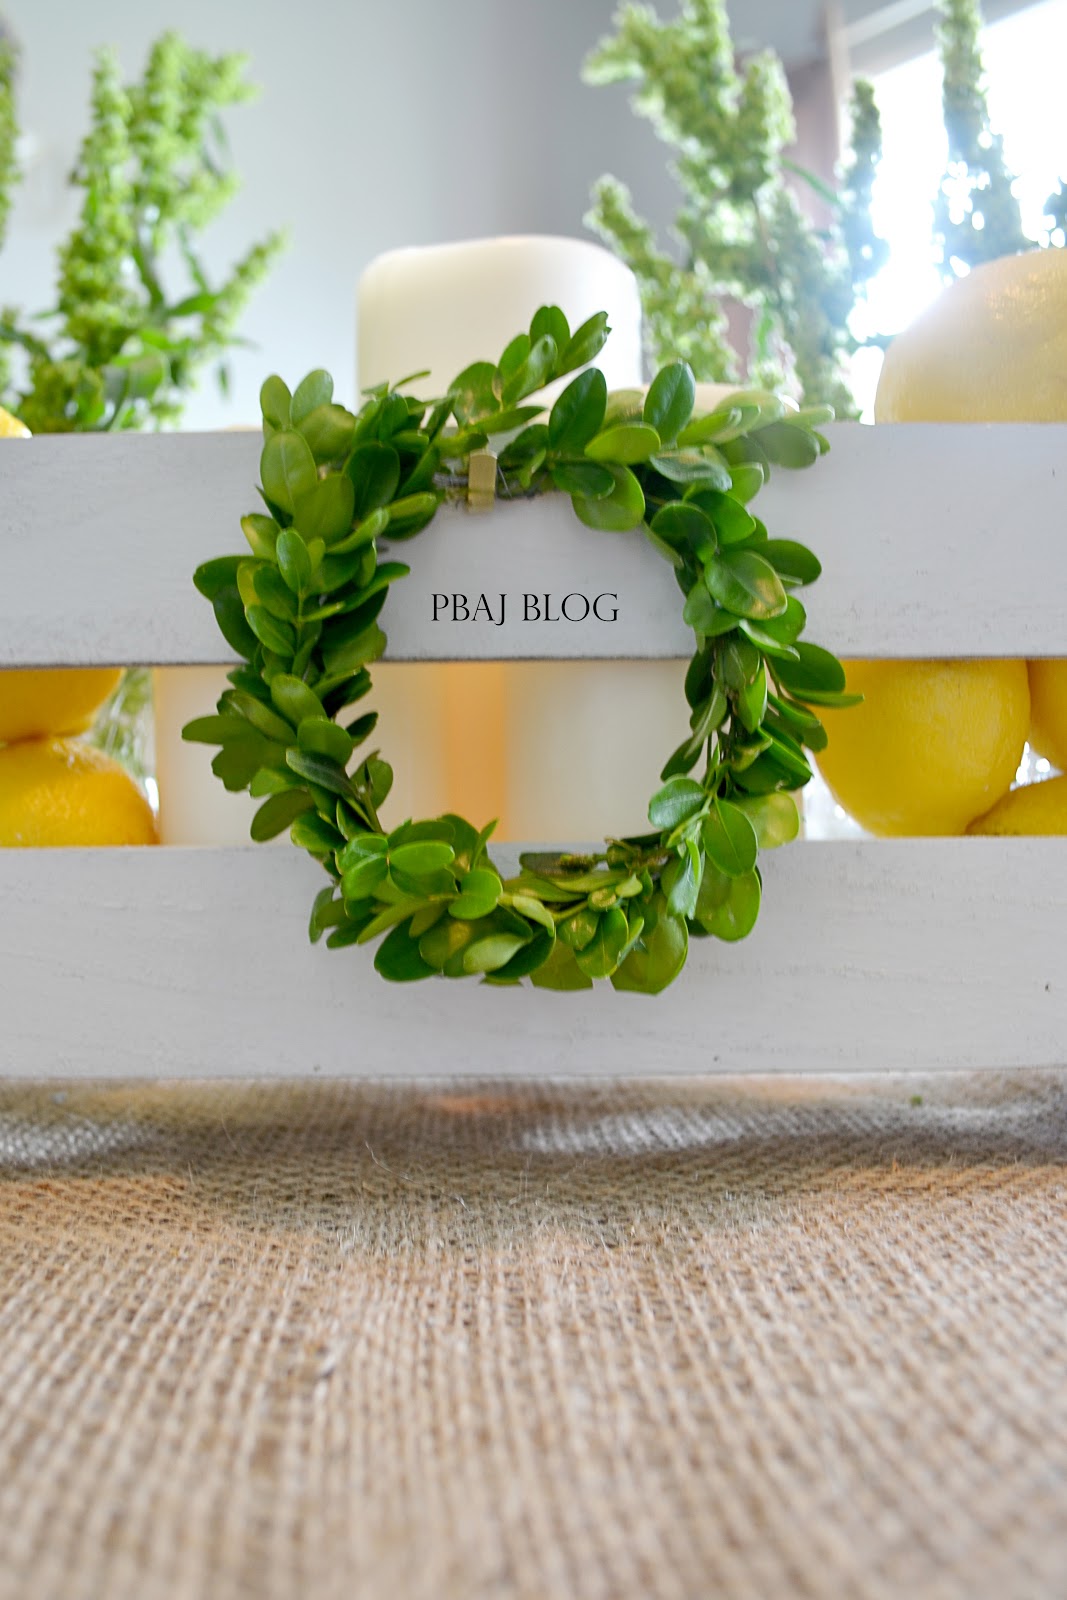
Summer Crate Centerpiece.

I have been itching to post this new project I've been working on all day, however my little Mister Bennett didn't want Mommy to do so. Now that he has stopped fighting it & has gone down for his well needed nap, Mommy has a few mins to share! 
Fingers crossed he gives me a chance to shower after too..., obviously this post is way more important ;)!

I am not going to waste any time. 

I picked up this crate at Michaels. Honestly I could have easily made my own that looked identical but it was only $4.99 & I used my 40% coupon so it was worth it to save me a little time in this case. 

Here is the
 Before:

Yep Just a plain Jane little crate. I had an idea what I wanted to do to it & I just went with the flow. Here is what I came up with.

After:


I think it adds a nice summery feel to my dining room don't you?! 
I am to say the least, very pleased!
Not only with the rustic chicness it brings into the room but also with the price it took to create this masterpiece!

Lets talk Cost!
The only purchased items used in this project were 

1. The Crate - $4.99 minus 40% Michaels coupon.
2. Pack of 4 box feet (the legs I added to the crate)- $7.99 minus 40% off coupon.

Everything else I had around the house! :D Love when that happens! 

PS. The tall greenery in the back!... found while on a walk with my boy.. put a little water in mason jars & they are a free way to incorporate summer into your decor. 

PSS. That cute little wreath hanging on the front of the crate.. Totally made that using items from my garden! 
You can find beauty in everything!

I would say I made out well! 

Happy Tuesday All!

Amanda


Sunday, May 19, 2013

2:1 Vintage Scale Makeover & Easy DIY kitchen Curtains.


I have been so busy busy busy! So please forgive me for my lack of posts!
I have most definitely been holding back! 
I recently began school again, working on my photography certification, & have been focusing on spending as much quality family time as possible. The marine corp is working my hubbies to the bone, preparing him for another upcoming deployment. So every chance we get is spent out & about with Daddy! 
Which brings me to whats happening this week!! So excited to say that we will be road tripping to see family in Long Island, NY! About time! We've been trying to make it to see this side of my family since before Jim and I were married 3 & a half years ago! So it will be really exciting for us to all get together & for everyone to get to meet and spend time with us & little man. 
I'm hoping to maybe get a chance to do a little thrifting/shopping & maybe bring back home a little inspiration with me. I'll be sure to take tons of pictures! 

90 degree weather and I sit here hot cocoa in hand (yes... I know, wrong season) debating where to even begin todays post.  

Both posts today take place in my kitchen. 
A few weeks ago, while thrift store hopping with my Mother in law & Sis in law, I stumbled upon this vintage, weathered gold scale. I debated even touching it but after weighing my options (haha.. get it ;),  I opted to give this beautiful piece a fresh new look. 

 Here is the Before:


& here is the after: 
Look closely & you may find a few sneak peaks into some future DIY's!


Well... :)))))? It looks better than I even pictured in my head! 
Any excuse to purchase new cactus friends. (guilty obsession.. could be something worse.) 
For this project I decided to work with white, I wanted a clean fresh color that would really make the colors in the cacti, POP! I took the scale apart, drilled a small hole in the bottom of each bowl for excess water to drain out, spray painted each piece individually with valspar spray paint with primer (saves you having to prime beforehand). I gave the scale a nice matte clear coat to lock in the paint, being that it will be getting wet when I water my plants. Last but not least I planted these cute little babies!
How much did this project cost?

Vintage Scale - $4.00 
Valspar White Spray Paint with Primer - Left Over from a previous project.
Rustoleum Clear Coat in Matte - Left Over from a previous project.
Cacti - $2.89 a piece at Lowes.

Grand Total: $6.89!!!! 
Worth every penny!

Now onto the next topic of discussion tonight... 
The DIY Kitchen curtains featured in tonights post! 
I'm so in love! & let me just say how simple & inexpensive they are to make! 


All of my supplies were purchased at Target:

1. Tention Rod. 
2. Fabric Napkins. 
3. Curtain Clips. 

Assemble. Really no lie that's all there is to it! 
I decided to make the curtain a half curtain, I have a shelf in the works that will be hung above the curtain as a plant ledge. However, you could virtually use this curtain technique in any room on any window, maybe not with these napkins but how about a table cloth?.. sheet?.. just a fabric you picked up?.. You decide what best suits you!! 

I love my new dolled up little window! 
What do you think?

Hope everyone had a fun filled weekend! My cocoa mug is empty.. oh no!! ;)

Amanda 


Tuesday, May 7, 2013

Suitcase Side Table & Bennett's 7 months.

Please tell me.. where in the world does the time go? 
It seems like just yesterday I was in the hospital holding this boy in my arms for the first time.. (Photos below,please excuse my appearance.. I had just, well you know.. had a baby & all.) 


 My 7 lbs 3 oz, baby boy Schmidt, all warm and snuggly. We blinked & tomorrow this itty bitty baby, Bennett, will be 7 months old & is now weighing in at a whopping 17 or so lbs! Still, just as adorable of course! 
I am so beyond in love with my boy! Everyday I wake up & can not wait to see his beautiful face, hear his little laugh & hold his tiny hands. ( :( Slow down Bennett, Mommy wants you to stay little forever!!)
Ok, ok I will stop with the mushy stuff now.

Here is a peak into Mister B's room, with my DIY suitcase side table plus a few small added details to add to our story nook corner. 
& here it goes... 


What do you think? 
I had the suitcase from previous photo projects & was waiting for the perfect project opportunity to present itself. I considered turning it into a foot stool or small ottoman for the end of my bed, however was inspired by a friends fathers suitcase turned side table he had made for her. 
I fell in love but wanted to twist it to make it my own unique creation. I think the outcome is  quite adorbs!
All of my supplies other than the suitcase itself were found at Lowes. 
I chose to use a light blue color by Valspar called Tranquility. When I reveal Bennett's full room you will see it is the same color as his bed spread and a shade or two lighter than an accent wall I painted, so it really pulls the whole room together. When he grows out of it, it will look cute in any other room as well! 
I sanded, painted, clear coated, & assembled & there we have it! A fresh look to something old!
The shelf was built from old pallets, originally made to display my wine, but now nicely displays a few of many Bennett's books & a few abc's! The photo behind the chair was an old frame I had sitting in my decor closet (yes.. decor closet.. doesn't everyone have one of those? ha ha), I lined the inside of the frame with a colorful patterned wrapping paper, for easy and inexpensive art work! 

Happy 7 months my baby B! 
I can't wait to read many more stories with you in your new story time nook!


Isn't he the sweetest. How did I get so lucky?!

Amanda (Bennett's Mommy)